by Sara Arrigoni | Jul 31, 2014 | Personal Tidbits, Photography Philosophy

photograph by Elizabeth Wendland, lifeasasportsmom.com
I’m thrilled to be featured today over at the new “Life as a Sports Mom” blog, with a detailed interview with my dear friend, Elizabeth Wendland. You’ll recognize Beth from our 10-on-10 posts, but today she did something much different, as I share my thoughts and experiences on a variety of photography topics! Beth and I have been friends now for a number of years, since we originally met through a photography workshop. Since then, we have both taken slightly different paths with our photography, and it was an honor to chat with her about my experiences and passions as a marriage and family photographer.
I’ve shared a lot on my own blog before, but never quite like this. You won’t want to miss Beth’s post today!
Please head over and leave a comment to tell her I sent you!
by Sara Arrigoni | Apr 11, 2014 | Project Life
It’s April, and I’ve reached 100 days of Project 365! Project 365 is simple: take one photo a day for 365 days. I started on January 1, but some people start on their own birthday, a child’s birthday, or simply some random day!
Some fun facts from my first 100 days of Project 365:
* 4 photos feature coffee
* 6 photos that I appear in
* 16 photos do not include a face
Being “forced” to photograph everyday things daily can be challenging. Let’s be honest; my life is hardly glamorous. 🙂 But it is mine, and I want to celebrate it! Today I’m sharing 10 personal favorites from my first 100 days of Project 365. (To see them all, please check out #365blessedeveryday or browse my instagram account @theblessedeveryday.)

1/1/14: the first pic of the year. Love this pic of my boys.
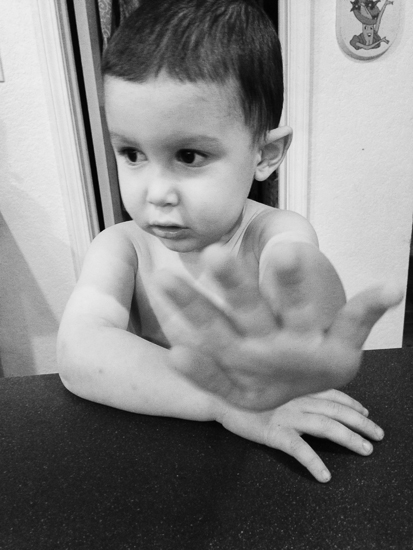
1/6/14: “Talk to the Hand”–only 6 days in, and Eli was already weary of pictures

1/21/14: Late-night shenanigans. Giggles in bed.
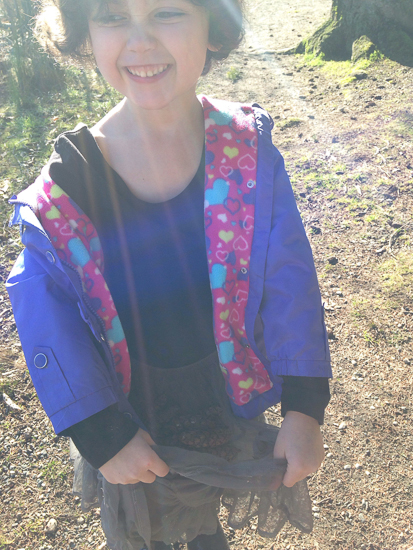
1/23/14: Not a perfect picture technically, but love the pure joy on G’s face.

2/7/14: at the shooting range, one of the few photos of me so far!

2/8/14: inspired by Hitchcock. Project 365 gives me the chance to experiment with some different concepts.
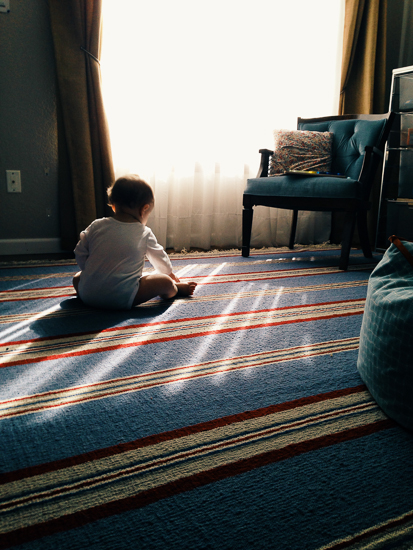
3/21/14: love the light streaming through the window
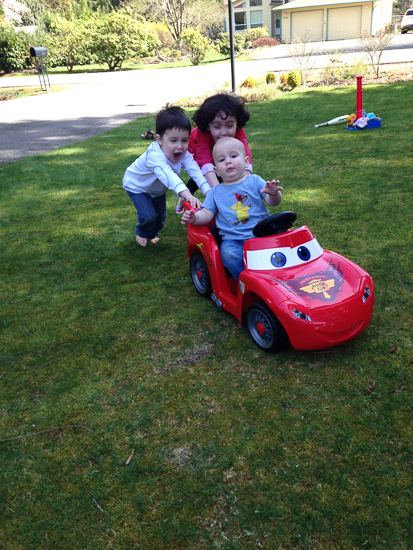
3/24/14: Mr. Toad’s Wild Ride? The kids take Lightning out for a spin.

3/27/14: one of my favorite images so far, father and son.

4/3/14: I have lots of sleeping baby photos, but none do I like more than this one, which was captured with the iPhone while Seth was in his carseat.
It’s never too late to start a Project 365. Is this a project you could join? Or is the more modest Project 52 (a picture a week) more realistic for you? Have you ever completed either? I’d love to hear about your experiences in the comments below!
by Sara Arrigoni | Apr 10, 2014 | Personal Tidbits, Photography Philosophy, Photography Tips, Project Life
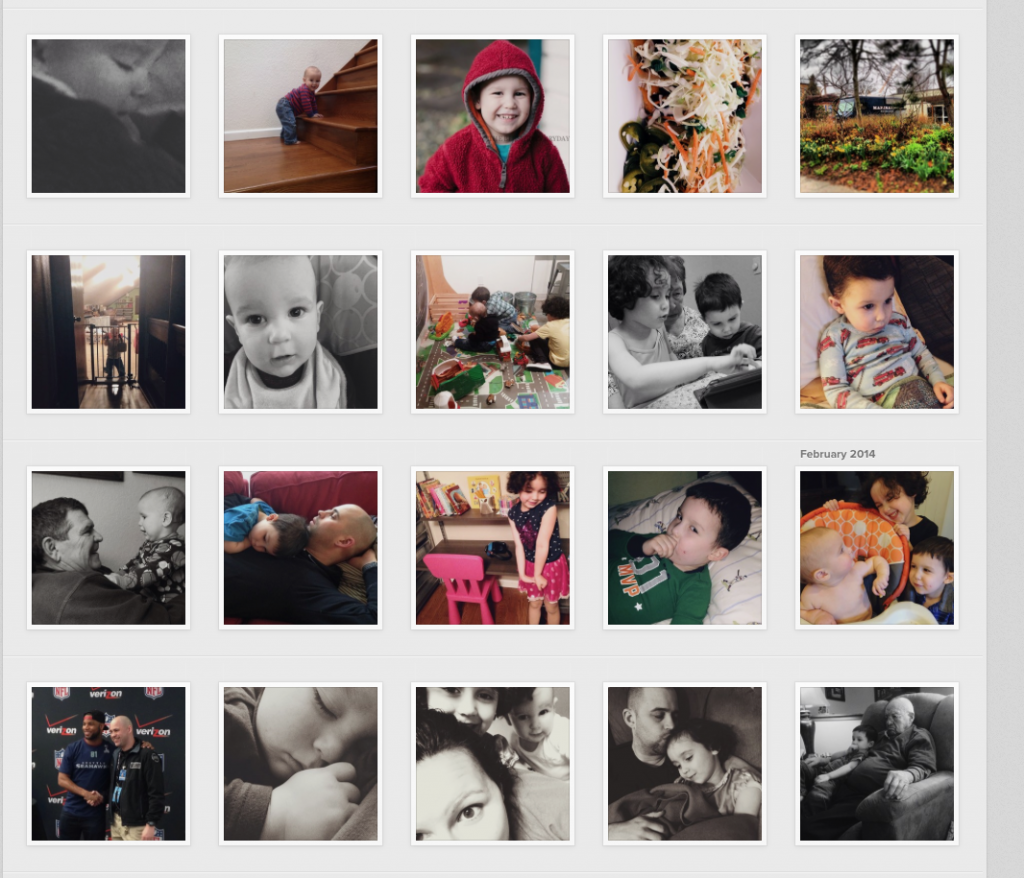
A sneak peek at my first 100 days of Project 365, as captured on Instagram.
I can scarcely believe it, but today marks day 100 of my Project 365! I’m pretty excited about this milestone, and I’ve also learned a few things along the way…
In previous years, I have attempted one Project 365 (which lasted about four days before I went down in a ball of flames) and one Project 52 (a picture a week). Both times were failures, and yet this time I’m succeeding! What changed?
This time I am committed; I am going to do this. And I have found a few strategies that help me…
Five Things I’ve Learned in the First 100 Days of Project 365:
1. Accountability is key!
I forced myself to be more accountable this time by joining Instagram and posting daily. Knowing that I have told other people that am participating in Project 365 and that I will have people to answer to if I don’t post has really helped me along. There have even been a few 10 p.m. text messages asking, “Where’s your pic for today?” that saved me from forgetting a day!
2. An iPhone picture can be a worthy way to capture your life.
Very few of my Project 365 photos have been taken with my DSLR. At this stage in my life, I don’t take out my DSLR often, for a variety of reasons (I don’t want my kids getting “camera fatigue,” I don’t want to have to worry about it with three kids getting into everything; the phone is nearly always with me). And even with just my phone, I have captured some precious memories.
3. Choosing a theme or particular challenge can provide inspiration.
There are a variety of photo “challenges” out there that offer prompts for your Project 365. Some people find these really help. @ClickinMoms on Instagram has a weekly post listing your prompts for the week. I haven’t done the prompts, but I have decided to challenge myself with certain areas of my photography (i.e. a meaningful “headless” photo, or use negative space creatively) to make my Project 365 more than just a series of snapshots.
4. Embrace the imperfections and even the “boring” days.
Not every day is going to be one that you deem photo-worthy, but that’s sort of the point. Project 365 isn’t a highlight reel; it’s a documentary of a year in your life, boring moments and all. Accept that not every photo is going to be a prize-winner, and not every day will be full of exciting moments. Embrace your reality.
5. Project 365 is really a project of gratitude and celebration.
Most importantly, recognize that Project 365 is really about celebrating the little things (and little ones perhaps!) in your life and honoring them, and about reminding even yourself that there are details and moments worth noticing everyday. Project 365 is awesome because it is helping to train me to look at the world with more gratitude, respect, and love.
Are you following my Project 365? Tomorrow I’ll post 10 of my favorite photos, but if you want a sneak peek, go follow me @theblessedeveryday on Instagram, where I share my daily photos, and search #365blessedeveryday.
(And please link up with your Project 365 if you are participating, too!)
by Sara Arrigoni | Mar 14, 2014 | Photography Philosophy, Photography Tips
A few months ago, I was so excited to have my dear friend Beth Wendland in town for a visit and to take my own family photos. Just like all of you, I am not immune to a bit of nerves at the idea of being on the other side of the camera, and selecting outfits is the major concern for most clients. So much was running through my head, and I’m sure many of you have shared the same questions: How to hide the baby weight I’m still carrying? What will look best in the photos? How do I select outfits without breaking the bank on a new wardrobe for all of us? As a client, I faced these questions, and as a photographer, I know how it is to be on the other side of the camera, too.
Today I’m sharing my top 5 tips for picking outfits for your family photo session, and I’m sharing one tiny sneak peek from my own family photos… but you’ll have to visit Beth’s blog post today to see more!
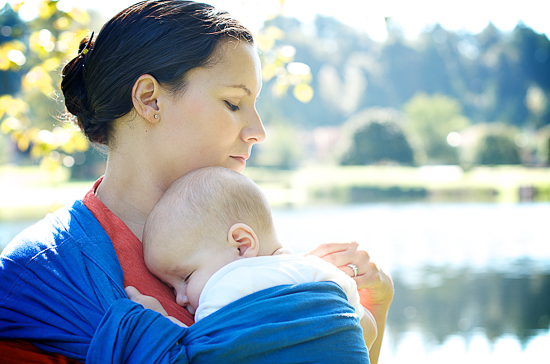
A tiny sneak peek from our session. Here you can see the coral and blue I incorporated into our family portraits. To see more images, you’ll have to visit Beth’s post today, too!
My Top 5 Tips:
1. Choose your photographer carefully based on their style, and make sure your color palette and outfit selections complement that style.
This sounds straightforward, but really, choose carefully. I chose Beth not only because she is a fantastic photographer and friend, but also because her style–rich, vibrant color–reflects my own preferences as well as my family and home decor. We are a casual, active family, and I think all of us have a bit of sass. Also, our home decor is fairly neutral, but with pops of color here and there. I wanted photos that reflected our personality and would fit in well in our home, and that’s why I chose Beth. Of course, it only made sense then to choose colors that played to her strengths, too. I love her use of vibrant color in her photography, so it would have been silly to choose monochromatic greys and whites! Let your photographer excel at what they do best!
2. Dress the toughest person first, then design the rest of the family around them.
In most families, there is one person who is a bit tougher than the rest to dress, either because of body image issues (ahem, that would be me), stubborn kids (maybe your teenager is balking at dressing up), or perhaps a husband whose wardrobe is smaller than your own. Often times, the tough customer is actually mom, the person who is signing up for the photo shoot! But whatever the case may be, start by selecting the “hard outfit” first. A lot of people reverse this, and instead focus on the kids (“Little Susie has a beautiful dress to wear, and I can figure out what I want later”) and then end up frustrated as the session date approaches. Instead, realize that your kids will probably look cute in whatever you choose–and often our little ones have more choices than us anyways! Find something that satisfies your family’s toughest customer, and the rest of your decisions can follow.
For my session, I dressed myself first. I chose something that suited me and that I would feel comfortable in, but that also covered up my “trouble spots” that I feel less confident in since having the baby. Also, since I knew that I might be playing with the kids and holding the baby, I opted against the dress I first considered in favor of something that I could move more freely in. I’ll never forget a session I did where the mom had told me beforehand in our pre-session consult that she wanted photos showing her active family, but then she arrived in a fitted white dress… we made it work, but it definitely altered my plans for the session!
3. Choose two colors as a guide for the outfits, and then mix and match prints and solids for an effortless yet coordinated look.
Often people reflexively want to select one color, or one print and have every member of the family wear the same thing. (“Denim shirts for everyone!”) However, this results in a very forced, matchy-matchy look in photos. Instead, choose two complementing colors, and mix and match a few classic prints and solids. For my own shoot, I chose coral and blue. I wanted something fresh that would work with the fall colors outside, and by mixing solids with simple prints, I ensured that things wouldn’t be too busy or clash. Avoid prints that are very small or with too much going on–you don’t want your outfit to look like a “magic eye” poster.
4. Dress for the season and the weather.
This is another tip that sounds obvious, but you’d be surprised how many children I photograph with chattering teeth because their holiday dresses are sleeveless and we are shooting in early December! Nobody photographs well when they are uncomfortable due to the temperature, and it just looks plain silly in photos when the weather obviously conflicts with the wardrobe choices.
5. Choose clothes that reflect the best version of the real YOU and your real family, not an idealized magazine ad.
I cannot emphasize this point enough! At the core of my own photographic philosophy is the belief that our sessions should reflect reality–not a varnished version of what we *think* other people want. Life would be boring indeed if every family showed up to photo sessions looking like the same J. Crew ad! When choosing to invest in family photos, invest in clothing and a photographer who will help showcase the real beauty of you and your family. You should look like the best version of you: confident and radiant and maybe a bit more polished than your day-t0-day look, but still recognizable as you. You and your family will all look best when you are comfortable and happy in your own skin, and your clothing should be a reflection of you.
My own family photos feature some images of Seth cuddled close to me in his ring sling. It may not be what every family would choose, but it reflects me and our family. Everyone who knows me knows I love babywearing, and it’s a major part of my motherhood and my kids’ babyhood that I wanted chronicled. Make sure your own family photos reflect what is important to you.
So how did all of this play out in my own photo session?
Well, to see a complete sneak peek from my own family’s photo session with Beth, you’ll have to head over to her blog today to check it out!
Please, tell us what you think! We love to hear your comments!
by Sara Arrigoni | Nov 18, 2013 | Photography Tips
Prepping for your family or couples photo shoot can be stressful for a woman. The sea of cosmetics and beauty items can be confusing for people who don’t normally wear a lot of makeup, but want to look just a bit more polished for their photo session.
Today, I come to the rescue with 5 beauty products that can flatter every woman. That’s right; these 5 cosmetics work for women of any age, skin coloring, and style. Best of all, most are also budget-friendly and readily available!
For photo sessions, I like a “you-at-your-best” look–nothing too dramatic or far of a departure from your “norm” but just a little more refined and dressed up for your shoot. Just a little makeup can emphasize your best features, since sometimes on film we can look a bit more washed out than in real life.
Here are a few of my favorites:
1. Pati Dubroff Perfect Natural Eye Palette (Costco, $17.99): this palette is a steal! With ten neutral eye shades that work for every skintone plus a pretty brown eyeliner, this palette can be used to achieve a variety of looks. And at $18, you can’t go wrong!
It’s sold out already on Costco online, but check your local warehouse; mine still had this palette as of my last visit. (If you can’t find it, the newer Pati Dubroff star palette color collection or Stila’s In the Light palette are similar, suitable alternatives, but both are a bit more expensive than the perfect neutral, which remains my favorite.)
2. CoverGirl Lashexact Mascara Waterproof Black Brown 935 , (Amazon.com or drugstores, $7): this is my favorite drugstore mascara. Affordably priced and akin to the popular (and much more expensive) Chanel Inimitable mascara, Lash Exact lengthens and thickens lashes. My motto with mascara is “go big or go home,” and Lash Exact doesn’t disappoint.
3. Stila Color Me Pretty Convertible Color Palette, (Amazon.com, $28): I have been a Stila fan since I first beheld their lipglaze pens in a movie. Of their products, their convertible colors remain a favorite. The Color Me Pretty palette contains five shades to flatter any skintone, ranging from peachy-pink to the neutral pinky-nude Peony to my personal favorite, Petunia. If you want the naturally flushed look like Natalie Portman or Kirsten Dunst (both of whom have used the Stila convertible colors in their movies), then look no further. These can be used on lips or cheeks, adding some bang for the buck.
4.. Orly nail polish in Taffy, (Ulta.com, $8): Orly’s Taffy is my favorite nail polish for photo shoots. A sheer soft pink with just a hint of sparkle, Taffy makes your nails look gorgeous… AND since it’s a soft, natural shade, it translates well in black & white photos as well. Some of the trendier shades that are popular right now (black, dark purples, navy) can look unattractive if photos are switched to black and white, so opt for a more natural shade for your photo session.
5… plus 1 extra: Cetaphil moisturizer & Ecolips lip balm (Cetaphil, best price Costco; Ecolips, available at Whole Foods or other natural food stores): Okay, so I promised 5 items, but I just couldn’t leave either of these off.
You know what’s not too camera-friendly? Dry, scaly skin and lips! Remedy those rough spots with these two great products. Cetaphil is a very cheap and effective moisturizer and is suitable even for most people with sensitive skin. Cetaphil is great for face and body.
And I first tried Ecolips when they were handing them out for free at a Dave Matthews Band concert, but once I tried it, I have purchased many more! It is simply the best lip balm I’ve ever tried… and I’ve tried many lip balms. Apply your lip balm before your gloss or lip color and your lips will look their best!
So now, tell me… did I miss any of YOUR favorite beauty items? What are your “go to” cosmetics when you want to look extra special? Or are there any beauty questions you have for your next photo session? Let’s keep chatting in the comments!
* Disclaimer: this post contains affiliate links for Amazon.com for some products.