
Rainy Day Solutions
I solicited some Facebook responses and questions to jump start my blog series on photo tips and tricks. My friend Amie inquired about how to get the feeling of natural light in a dark room, so I decided to tackle that first in our series.
Being from Seattle, I am well acquainted with being stuck inside, and dark, dreary days. Added to that, my house is a cavernous thing… we share a large house with my parents, but our half of the house upstairs has only three small windows spread over almost 2000 sq. ft., and the ceilings are all sloped and peaked, which only adds to the feeling of darkness. All that to say this is a subject that I interested in, and always looking for solutions, and I firmly believe you can still get beautiful images without spending a ton on fancy studio lighting equipment.
First, let’s be honest; there is no substitute for great natural light. Whenever possible, the obvious solution to getting the “feel of natural light” is to actually photograph near whatever natural light is available. This may involve getting closer than you ever thought possible to a window or door. For instance, in the image below, I am pressed up against a window, and I positioned mom sitting in a chair directly in front of said window.

This photo was captured using window light, softly hitting mom from the side.
In this next case, I decided to open the front door to allow as much light as possible (thankfully they had a screen door), and look how bathed in light this staircase shot looks. I was nearly standing outside for this shot, but it came out beautifully. Sometimes an unconventional solution can make a tremendous difference.
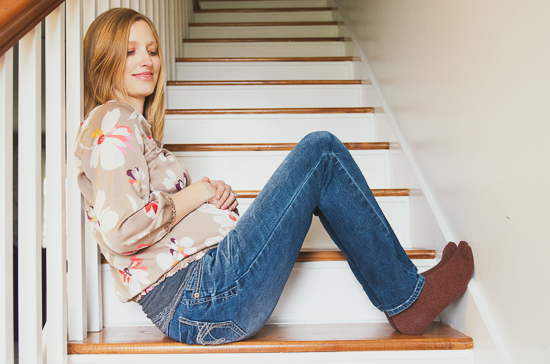
for this image, I was standing in their front door frame and nearly outside, but the resulting light was beautiful
Sometimes, though, you might not be able to arrange your “action” by a door or window, and so a different solution must be found.
First, I know it’s counterintuitive, but in general, throwing on a ton of indoor lights is not actually going to help you. The light produced from our overhead room lights usually isn’t of great quality, and since it’s from overhead, sometimes it can cast unflattering shadows on your subjects (raccoon shadows under the eyes, for instance) or an odd color cast (this is where white balance adjustments come in handy, but we’ll save that for another day). If I have to have an indoor light on, I prefer it to be from a softer, more ambient source, usually positioned somewhat away from my subject. Then typically I will utilize my external flash; most often I like it angled at about a 70-degree angle behind me, bouncing off the ceiling, or sideways, bouncing off a wall. This creates a softer light on my subject, which tends to look more natural.

This photo utilized bounced flash indoors.
Perhaps you don’t have an external flash though. I am not a fan of the camera’s “on board flash,” which tends to give a very harsh, direct light on your subject (think mugshots). In this case, I would try to push the limits on my camera’s ISO and go without a flash. Yes, your pictures may have a bit more noise than you would find optimal. But often I think a little extra noise is more flattering in a picture than uneven light or harsh shadowing. After all, a lot of post-processing treatments available now even add in grain to emulate old film! If you have to bump up your ISO, try converting your picture to black and white. Black-and-whites tend to weather a bit of extra noise better than color in my opinion, perhaps because our eyes are used to seeing the film prints of yesteryear.
So what are your favorite tricks and tips for shooting inside in the unpredictable Northwest? Please share!